Sunday, March 25, 2012

~Haku [Dragon Form]~

Eeee~!! Finally got it~!! xP Spirited Away is my most favorite movie of all time, and of course I love Haku's dragon form!! (His face is soo furry!! <3) And here he is!!:
(Version w/head support)
~.:Haku:.~
Materials:
  • Yarn: (all are regular worsted medium) Soft White, Pale Green (mane), a pale grey (underbelly), pale pink (feet and nose), lime green (iris), dark green (iris shade), pale gold (horns), and black (eyelid and pupil)
  • Hook: Size G (I use it for all of my projects)
  • Stuffing
  • 8 mini Popsicle sticks 
  • washable marker (optional but helpful)
Stitch Chart:
Ch= Chain
Sc= Single Stitch (Single Crochet)
Dc= Double Crochet
Sl St= Slip Stitch
F/O= Finish Off


.:~*Creating Haku*~:.

Head and Body:
(As you know, Haku is mostly body length. His head isn't bigger than the rest of his body, so we'll start at his snout and end at his tail in this part)
With White, ch 2
sc 8
Rnds 1-4: Sc around (put a place marker in)
Rnd 5: sc 1, 2sc
Stop and get grey. 
Attach it to where you want the top of the snout to be (mine is lined up with the place marker at the very end of the snout). 
Sc across the top once, then turn and follow the row up to Rnd 5 or one ch before. 
When doing the second row, hook the working string through the previous chs as well to pull them down. This way, they're not sticking up and look out of place. 
Sc the rest of the way parallel to the first row until the end. 
F/o and leave a long string. 
With that, go back and, just like you did in the previous row, sew down the chs so they don't stand up. Tuck in strings.
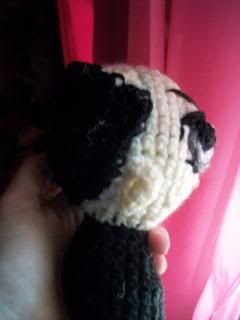

Now for the nose.
 With pink, skip down the sting (So you'll have a long end to sew on the nose from both sides) and  ch 3. Place nose where you want it and pull strings through side loops. Now take the ends and pull them through the ch closest to the middle of the snout. This gives the nose a little body. Pull the strings through the center ring you started with (the sc 8 center).
 Now it looks like a cat nose, which is very smiliar to his =) 

stuff snout

Return to the white 
Rnd 6-9: sc around

Stop for eye (make 2)
W/lime green, ch5
attach darker green and sc across top

F/O 
with black, Ch 2 and attach to middle of eye. 
Attach eyes to head (use washable marker to mark where you want your eyes). 
Secure to head then cut a long black string for the eyelid. Only pull it over the top of the eye. You may need to overlay the black a few times so make sure the string is long enough. =) 

stuff

Forget the Whiskers? Why yes, yes I did! xP 
But I've fixed him now..
For the whiskers, simply attach a long strand of yarn to either side of the snout.


back to white
Rnd 10-13: sc around
 stuff 
Rnd 14-17: sc around
 stuff
Rnd 18-21: sc around
 stuff 
Rnd 22-25:
 stuff 
Rnd 26-29: sc around
 stuff 
Rnd 30-33: sc around
 stuff 
Rnd 34-37: sc around
 stuff 
Rnd 38-41: sc around
 stuff 
Rnd 42-45: sc around
 stuff 
Rnd 46-49: sc around
 stuff
 Rnd 50-53
 stuff
 Rnd 54-57: sc around
stuff
 Rnd 58-60:sc around
 stuff 
Rnd 61-64: sc around
 stuff
Rnd 65: sc2tog, sc rest

Rnd 66-68: sc around

Rnd 69: sc2tog, sc rest

Rnd 70-71: sc around

Rnd 72: sc2tog, sc rest

Rnd 73-74: sc around

Rnd 75: sc2tog, sc around

Rnd 76: sc around

Rnd 77: sc2tog, sc rest

Rnd 78: sc around

Rnd 79: sc2tog sc rest
 sew hole closed
 F/o


Face fur:
W/ white:
attach fur around his jawline, which is one row behind the eyes
attach it along underneath the jaw and to the other side
make sure they're aligned on both sides.

How to attach fur (yarn) ?:
Loop the yarn around each finger except for the thumb on one hand (kinda like cat's cradle)
Line the loops up:
Pull loop end through desired ch:
Now, pull the other end through the loop to make a knot. Pull it tight.


Cut the ends and voila! Fur =)


Mane:
With Pale Green, go along his (imaginary) spine and add his mane.
The beginning fur should start on the row behind his eyes.
It doesn't reach all the way to his tail tip, so leave some space.
I left about 15 rows between the tail and the body mane.
For the tail, Make sure the piece of fur you add to the center is the longest piece so that when you add the other fur around it, it appears triangular like Haku's.


Underbelly:
With pale grey, sc down his belly (like you did the snout) until you reach the row where you ended the mane.
Sc back up the belly (remember to sc through the first row as well to pull it down) and F/O where you started, leaving a long tail.
Weave the string through the 2nd row of sc to pull those down for a flat underbelly.
See how it sticks up?

See how it becomes flat?


Front leg (2):
 ch 2
sc 6 in 2nd ch
Rnd 1: sc1, 2sc in next
Rnd 2-4: sc around
 stuff 
add popsicle stick


Rnd 5-7: sc around
 stuff
Rnd 8-9:sc around
 stuff
with pale pink, Rnd 10-11: sc around
 bend the area where the elbow would be and tie the inner crease (with white) to stay in place
 be careful not to let the popsicle poke out

 Rnd 12:sc around 
stuff 
then add second popsicle 

Rnd 13-14: sc around
 stuff a little
Rnd 14-15:sc around 
Rnd 16: sc 2tog around
sew hole closed

Popsicles look like this inside the leg:


feet (2 per leg):
With pale pink:
ch 2
sc 5 then sc tail
Note: sc tail uses the tail rather than working string:


f/o and add to bottom of leg
 use tail yarn to secure it onto the leg, other end to weave through chs to secure as well


toes (3 per foot):
With pale pink:
ch 6
sc across those 6
F/O and attach to foot
to point them straight out, attach them normally then attach the with the string on either side of the toe to the base foot. This pulls the yarn (but not too noticeably) to make it stand straight.
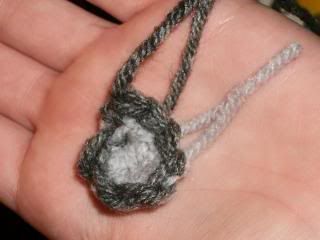

Ears (2):
With white:
ch 7
sl st, sl st, sc, dc, dc, dc
the above looks best as the left ear on Haku (well, his right) and if you want the other ear to look opposite (doesn't really matter but I am a bit picky about that) just take the above sequence after ch 7 and reverse the order. You probably won't get the last sl st (I didn't :/)  so I just took the end piece and tied a tiny knot, then left a long tail from the working ch. Doing that, I pulled the end through the other chs (preferably down the middle) so that I could get the string to the other end to sew onto the head. Going through the other chs hides the fact that it was on the other end. For the other end, just pull it through the chs as best as you can, since it probably won't meet the head end.


Horns:
With pale gold:
ch 2
Rnd 1:sc 4 in 2nd loop
Rnd 2-5: sc around
Rnd 6: sc2tog around (it'll only go 2 times)
ch 2
sc down through the one ch
f/o weave tail through ch to bottom 

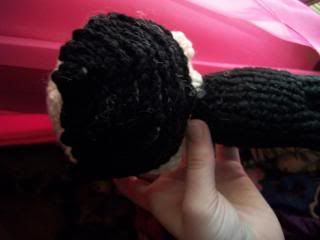
To Pull Haku's Head Up Straight:
Not really necessary unless you plan to have him standing a lot
If you don't plan on having him stand, I'd suggest tying his legs upward so that he looks like he's flying =)
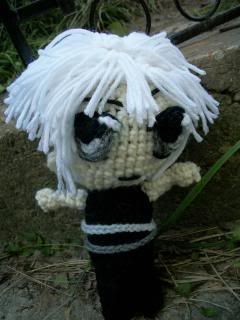
Example (Note: he's not finished in this pic):

Anyway:
This is a matter of balance for Haku
Tie one long strand of white yarn to either side of his neck right beside his shoulder.

With that, weave the strings through two rows on either side of his neck then pull them back to the starting knot.
Tie another knot
As you do this, you will see his head and neck lift in response to the string pulling him. It may take a few times of repeating this step and moving up a few rows, but it's pretty easy.
Don't stop until he is able to stand up with his neck up
(NOTE: HE WON'T DO THIS PERFECTLY. His feet are unable to fully support him at EVERY angle, but he will be able to stand up with proper adjustment. It's something you have to play around with)
If you plan on having his neck straight, also have his head tucked downward some. It looks weird to just stand straight up with the neck. 
Attach a string just like with the neck and weave it under Haku's jaw to pull it down.

Voila!! You have your own Haku~!! Yaaay~!! =33


lol notice my army in the back?


Haku is from Spirited Away and is copyright of Hayao Miyazaki.
This is a free pattern and is in no way to be sold or redistributed.
Thank you. =)


Monday, March 19, 2012

Random 'Rumis!!

Just to shake off some of the dust....here's some of the other 'Rumis I've made~! =)
Sorry, no patterns, but they're all the basic body pattern from Sayjai so they shouldn't be very hard to figure out if you really want one xP (body pattern link: http://kandjdolls.blogspot.com/2011/09/amigurumi-free-basic-body-crochet.html)

~:*Aang*:~
From Avatar: The Last Airbender

~:*Sesshoumaru and Rin*:~
From Inuyasha
Note: Rin's body pattern is obviously not the same, but it's easy to improvise. It might be possible to take Sayjai's body pattern and simply half the numbers.

.:~*L*~:.
From Deathnote
Note: His shirt was made with very thin white yarn, which is why his arms look a little weird. xD Use regular white yarn and you'll be good to go~! (I'd suggest making his shirt longer too, by crocheting more rows on the "backloops" Round)

.:~*Ichigo Kurosaki and Hichigo*~:.
From Bleach
Lost my original photo (R.I.P. Windows Vista...) so I took the one from my deviantart, which is why there's a watermark. xP

.:~* Kiba Inuzuka and Neji Hyuuga*~:.
From Naruto

.:~*Gaara Amigurumi*~:.
From Naruto

.:~*Kagome Amigurumi*~:.
From Inuyasha

.:~*Akamaru Amigurumi*~:.
From Naruto

This is actually my own personal pattern. I want to add some more detail to him (i.e. the paws) before I post the pattern. =)


Thursday, December 22, 2011

~Auron Amigurumi~

A Final Fantasy 10 'Rumi has appeared~!! =)


.:~*Auron*~:.

SPECIAL THANKS GOES TO SAIJAY AND ROB @ http://kandjdolls.blogspot.com/
The body pattern for this amigurumi comes from one of their patterns (the adorable Pink Little Lady)
and they have kindly posted the original body pattern on their blog to use with these doll designs. =) Thank you again!!


Order of Importance:
*Check Color Chart
*Legs and Rnds 1-18
*Eyes (Shades) and eyebrows
*Ears
*Finish Head
*Collar
*First arm (kept inside kimono)
*Kimono
*Belt
*Other arm (free one)
*Sleeves
*Shoulder guard
*Belts on collar
*Sew collar so that it's close enough to not see mouth or nose
*Hair
*Sword (optional)

Body Pattern:

Color Chart:
-Legs: Rnds 1-5: Black
Rnds 6-8: Dark Grey
-Body: Rnds 1-10: Dark Grey
11-23: Skin
-Eyes (Shades): Black
-Arms: Skin
-Kimono: Dark Red (lost name for the one I used) and Navy Blue
-Belt: White and Light Blue
-Belt, Shoulder Guard, and Collar Belts: Brown
-Shoulder Guard Designs: Bright Orange ( the real color is supposed to be yellow but I was out and it won't make a drastic difference)
-Hair: Black and Light Grey
-Sword: White and Silver

~Creating Auron~

Auron is very time consuming so be warned....

Eyes (2):
w/black
Mark your spots with a washable marker. This helps very much in getting his shades just right.
As you can see, I put mine a little lop-sided haha, but it gave him a nice pose in the end. =)
Stop at Rnd 18 
We rarely see his eyes so there's no point in making them unless you just absolutely have to.
Ch 2 and leave long tail
sc 8 then sc tail (treat tail as regular working yarn). You have 9 sc now
sc around then sl st into first.
F/O
Frames: w/black ch 5
attach to one shade just above where you finished off
sc 5 
ch 3
attach to other shade above tail
sc 5
ch 5
F/O
Sew to head


Eyebrows:
Take some black yarn and attach them in his usual "angry", slanted style.

Ears:
W/skin color ch 6
hdc 3, sc 2, then sl st.
 F/O and attach to the head on the row below the eyelid line.
 I put them about 3 ch rows from each eye. Attach the ears on both sides.
Put them right under the shade frames.


Collar:
w/dark grey
sc backloops of Rnd 10 (where skin color starts)
*sc 1, then 2 sc in next* around
sc around
*Sc 2, 2 sc in next*
sc around, sl st in next
F/O

~Finish crocheting the head now~

Crochet one arm and attach it to the body sideways.
This is the one he always keeps above the belt.


Kimono: 
w/dark red
ch 26
Dc 8 rows 
(Mine is 7 rows but I found that I really needed 8 to work easily)
Attach Navy Blue and sc up both ends. Don't Sc around the whole thing.

Belt:
w/white
ch 40
sc across
Attach Light Blue
sc across
Attach white again
sc across
F/O

Wrap Auron in his kimono and tie the belt around him as tight as you can.
You want to make sure the belt will hold the kimono in place no matter what.
(Note: the shoulder guard in the pic is NOT supposed to be there yet. It was a test run.)

Buckle: w/ Brown ch 6
sc 3 rows across
F/O and add to front

Attach Kimono w/ red yarn at top around collar

Crochet other arm and attach to kimono.

Sleeves (2):
w/dark red
ch 14
Dc 5 rows
F/O
 Add both  and angle the one without an arm so that it looks like it's just hanging there.

Shoulder Guard:
w/brown
Ch 2
sc 7 and sc tail
*1 sc, 2sc in next*
*sc 2, 2 sc in next*
Sl St
Designs:
w/ bright orange, randomly sew on strands to look like his pattern.
The design doesn't go farther than the rim of the guard so don't let it hit the center.
Fun Idea: Sew on your name here~!! =) 
Attach to robe above the limp sleeve.

 Collar Belts:
w/brown
Long one: ch 50 and sew on
this one goes almost completely around but not all the way
Short one: ch 30
Goes right in the middle a row or two below long one
Vertical one: ch 5
Goes right down the middle of both.

Note: The long belt goes on top and the short one goes below it. On mine, I accidentally sewed them on backwards (while sitting there looking at the picture the whole time @.@)
So don't go by my picture on this one! xD

Hair:
(Finally, right?)
Get your hand dandy washable marker and mark his hairline.
He has 3 noticeable grey spots. (peak, and one on either side of head)
When doing the hairline, make sure that the line is all black except for the peak, which should be grey.
Put the other two grey spots behind the first row of black.

Pat his Hair back and cut it short.
The grey peak partially falls down so take a few strands and make that effect.

Sword: 
W/ Grey: ch 28
sc across
W/ white: 
tc (treble crochet) 10 times, dc 10, 5 hdc, 3 sc, ch 1
F/O

~And Finally, Auron's Done!!~
PHEW....
Sorry, Don't have a lot of pics for this one!! 

I hope you enjoy him and thanks for visiting~! =) Please do not repost this pattern or Sayjai's pattern without permission.  This pattern is for free use and not to be sold anywhere


Tuesday, December 20, 2011

~Ponyo Amigurumi~

Ponyo, ponyo~ ponyo ponyo~! Made as a Christmas present for a friend (because they went nuts over the movie and kept begging me to play it over and over and over....) but now you can have this cute little mermaid-'Rumi for Christmas, too! =)


.:~*PONYO*~:.
 SPECIAL THANKS GOES TO SAIJAY AND ROB @ http://kandjdolls.blogspot.com/
The body pattern for this amigurumi comes from one of their patterns (the adorable Pink Little Lady)
and they have kindly posted the original body pattern on their blog to use with these doll designs. =) Thank you again!!

Order of Importance:
* Check Color Chart
*Crochet Legs and Rnds 1-18
*Add Eyes, eyebrows, and mouth
*Finish head
*Crochet her bloomers and dress
*Add arms and sleeves
*Add hair


Body Pattern:

Color Chart:
-Legs: Skin Color
-Rnds 1-3: Skin Color
-Rnds 5-10: Medium Pink
-Rnds 11-23: Skin Color
-Arms: Skin Color
-Sleeves: Medium Pink
-Hair: Orange

~Creating Ponyo~

Eyes (2):
Start at Rnd 18 for her eyes
Hint: Use a washable marker to mark where to place eyes and mouth
-W/Black:
ch 2 and leave a long tail
sc 7 and sc tail (take the tail and treat it like regular working yarn) into 2 ch from hook
F/O
Highlights: 
w/white
ch 2 w/long tail
sc 6 and then sc tail 
F/O
Note: Sc tail closes the center hole so that it looks perfectly round. You may use another preferred technique if you wish as long as it gets the job done. This one works pretty good for me.

Eyelids:
 Hers go in an oval shape, so take a long black yarn strand and create that shape over her eye.
 Tie one end firmly (but don’t pull it out of shape!) inside the head so that it doesn't fall out of place. 
I tied the left corner. 
Now, you need a small string to tie the top to maintain the oval. You can use thin black string OR if you’re one of those people who a) doesn’t have black string at the moment b) it’s MIA or c) will creatively think of every possible solution to your problem so that you don’t have to move from your warm spot, then have no fear.
 Just cut a short piece of black yarn and pull it apart. Pull it until you have the thinnest strand and use that.
 The trick is to tie the string over the yarn through the same hole so that it won’t show
Voila!

Eyebrow:
W/Pale orange:
Cut a strand of yarn and place it over her eye, somewhat in an oval, too.

Ears:
w/Skin Color
ch 7
sc, hdc, dc,dc, hdc, sc
I usually attach the ears 3 rows back from each eye.

Bloomers:
(that's what I call them anyway)
Attach white yarn to the row just below Rnd 5 (where you worked the pink backloops)
dc around
when you're back to where you started, connect the bloomers through the legs so that it makes a diaper effect.

Sleeves:
W/ medium pink, ch 11
sc across 
sew on around the arms

Hair:
Ponyo's hair is curly and messy, which makes this pretty easy.
Attach her hair and cut it short enough to stick out randomly
Keep her hair short in the back.
Note: She has bangs that swoop to the right side of her face so be sure to add those as well.

~Ponyo is finished!!~

 I hope you enjoy him and thanks for visiting~! =) Please do not repost this pattern or Sayjai's pattern without permission.  This pattern is for free use and not to be sold anywhere

Thursday, December 15, 2011

~Hatsuharu Amigurumi~

Yup! Straight from Fruits Basket's cursed Sohma house, it's....

.:~*HATSUHARU SOHMA*~:.
SPECIAL THANKS GOES TO SAIJAY AND ROB @ http://kandjdolls.blogspot.com/
The body pattern for this amigurumi comes from one of their patterns (the adorable Pink Little Lady)
and they have kindly posted the original body pattern on their blog to use with these doll designs. =) Thank you again!!

Order of Importance:
*Check Color Chart
*Legs and Rnds 1-19
*Add eyes, eyebrows, and mouth
*Finish head
*Add ears
*Add Hair
*Crochet Arms
*Add Accessories 

Body Pattern:

Color Chart:
Legs and Rnds 1-10: Black
Rnds 11-23 and Arms: Skin color
Hair: Black and White
*Skip working the backloops on rnd 5*

~Creating Hatsuharu~
-Eyes:
Stop at Rnd 19 and start crocheting the eyes.
Helpful Hint: Mark spots for eyes and mouth with washable marker
-Colors: Gray, silver, black, and white

Iris: Ch 6 then sc tail
(to do this: pull tail through center ring and sc it like you would on a regular working chain)
Change to gray and sc around
F/O w/long tail for sewing
Pupil: ch 2, 
                   5 sc in ring, sc tail
Highlight: 
w/white Ch 7
Sew on the eyes where you marked. Make sure the whole pupil is sewn down. 
Take the highlights and pull one tail through a loop in the black pupil and the other tail just outside the iris. 
This gives him the "anime-eye" effect. =)

Eyelids:
This is very simple. Just cut four strands of yarn and sew them across the top and bottom of the eye. Voila!

-Eyebrows:
 Angle them slightly since Haru usually has a bored or pensive expression but keep them relatively straight.

-Mouth:
 Just a single string but very hard to get the right angle. Most of them look like they're smiling when I do it.

-Ears:
w/skin color ch 6
hdc 3, sc 2, then sl st in last st
F/O 
-FOR OPPOSITE EAR:
w/skin color
ch 6
 sl st, sc 2, hdc 3
F/O
I usually put them about 3 rows from the eye.


-Hair: 
White top w/ shaved black
- Make the hairlines with a washable marker.
 Sc on top of the line and then go down the next part until the area within is filled.
1 2 3 4
-For the white part: Simply add and cut. This is really fun.
The back part of the white hair needs to be almost a bowl cut.
For his bangs, have the ones on his forehead short and the ones next to them a little longer.
He has two long strands going down the side of his face below his ears.

-Arms: skin color only

-Earrings: 
Take silver string and tie through earlobes. Hide tails from view but don't cut them. They'll stick out.

-Belts: w/silver and dark grey
ch 29 and tie.

~Your Hatsuharu is complete~ =)
Hope you enjoy your new 'Rumi! =)
Please do not re-post this pattern or Sayjai's pattern anywhere without permission. This pattern is for free use only and is not to be sold anywhere.