Akamaru Amigurumi

Hey, everyone!!
Guess which cute little puppy dog now has a pattern!!
That's right ;)
Our cutie patootie Akamaru!!
Just be warned! This pattern has a lot of reading!
It's relatively simple though. (I'd say on an medium level)
So let's get started!!
A Shinobi’s weapons of choice:
size G hook
Regular
skein of white, black, and brown yarn.
(also light or dull pink for paw pads)
Good
ole bag of stuffing
Pins
or something to clip facial feature on (optional but VERY helpful) You can also
mark spots with a washable marker or sharpie (for the brave ones).
Notes:
terms: ch- chain
St- stitch
Sc- single crochet
Sl st- slip stitch
dc- double crochet (won’t be used much)
hdc- half double crochet (won’t be used much)
F/O- finish off
2tog- sc 2 chs together (also known as decrease)
Tail- the end string created when tying a not. Any string that you're not working with basically.
(_)- number in parenthesis is number of sts you will have at the end of the round or row
*_*- instructions in asterisks mean to repeat instructions until the end of the round is reached J
Be sure to
stuff periodically as you go along. Stuffing is very important in this pattern
because it defines the body shape and gives Akamaru his plumpy cheeks and big
head :3
When the
pattern says to attach or sew on a piece, I want to clarify and say that you don’t necessarily have to pull
out the needle and thread. (and the thimble uggh) Just use the yarn and hook and
pull the yarn through the same way you would with thread.
IMPORTANT NOTE:
Be careful with your amigurumi!! Even though they are ridiculously cute and
perfect for cuddling, like any other toy they are susceptible to wear and tear.
PLEASE never pull on your amigurumi. If it gets stuck, gently amend the
problem. DON’T EVER TUG. This causes the yarn to stretch (permanently) and then
the stuffing starts seeping out and trust me it is not a pretty sight. IT CAN
BE WASHED, but that if it absolutely needs it. Putting it in a washer always
has the chance of getting caught and ripped.
And finally, if
you mess up, don’t fret! It can always be undone or repaired~ J
Head:

(front view of head)
with white-
ch2
8 sc in 2nd ch from hook (8) –this creates a
circle, or magic ring as some call it-
2 sc in each st
around (16)
*1 sc, 2 sc in
next st* (24)
Sc around (24)
*2sc, 2sc in
next* (32)
Sc around (32)
*3sc, 2sc in
next* (40)
Sc around x 6
(6 rows) (stuff a little bit here, be sure to pull in the beginning tail from where you
started crocheting so that is doesn’t stand out on top of akamaru’s head )
Cheeks: *sc 17,
2 sc in next 3* (46)
Sc around x2 (2
rows)
*sc 21, 2sc in
next 2*
Sc around
(stuff some more. I stuffed relatively firmly, enough that Akamaru’s features
were accentuated well. I also added a bit more stuffing where I wanted the
snout to be, so that the face wouldn’t appear so flat.)
*2 sc, sc2tog*
Sc around
*1 sc, sc2tog*
Sc around
*sc2tog around*
Weave string through the chs individually, which closes the hole nice and
neat J

(Or thread it through two at once like above)

(Head from the side so you can see the snout. You can add more stuffing if you'd like, just not too much since it wasn't made to be a fully pronounced snout.)
Face:
Nose: with brown (I used black, but it doesn’t matter which you choose)
ch 2
6sc in 2nd
ch
Sl st
Ch 2
Sl st into next
ch
Sc in next 2
Sl st in next 2
Sc in next 2
Sl st F/O

His nose should look
kinda like a mushroom J
Attach nose

(I attach it by weaving the string through the nose itself rather than going around the edge. It gives it a cleaner look)

Ta-daa~!
Eyes:
Cut out two long strands of black yarn.

Tie on

Pull over and pull yarn through a ch


pull ch up over eyeline and through ch above eyeline

Hide away tail and you're done
Ta-daa~
(the eye on the right has a thicker corner because I also pulled the beginning tail over the eye with the final tail. On the left I hid the tail in the head. You can do whichever you like)
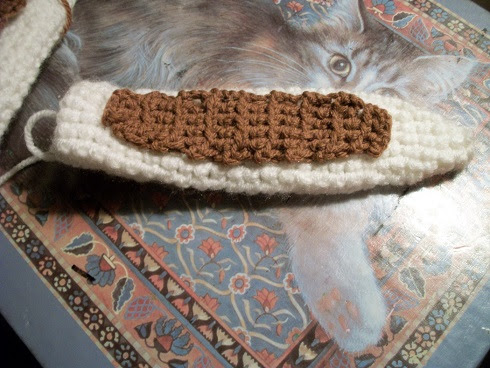
Mouth:
ch 20
With attaching the mouth, be sure to either mark the spot on
his face or attach the mouth with some sort of clip, pin, or whatever you
please. It helps TREMENDOUSLY and could save your Akamaru’s face. Remember
that.


:D
Ears: Don’t stuff the ears! They need to be empty and flat.
With white-
ch 2, 5 sc in 2nd
ch (5)
*1 sc, 2 sc* (7)
*2 sc, 2sc* (9)
*3 sc, 2 sc* (11)
*3 sc, 2 sc again* (13)
Sc around x2 (2 rows)
*3 sc, 2 sc again*
Sc around x 18 (18 rows)
4 sl st
F/O with a semi
long tail
Brown on ears: ON EACH OF THESE BE SURE TO CH 1 BEFORE TURNING
TO WORK ON THE NEXT ROW
ch 4
Sc across x 2
(row)
Turn, sc
across, 2sc in last sc, ch 1
Turn, sc
across, 2sc in last, ch 1
Sc across x 12
(12 rows)
Turn 2 tog sc
across
Turn 2 tog sc
across
F/O sew onto ears then attach ears.


BODY:
with white:
Ch 2
8 sc in 2nd
ch (8)
2 sc around
(16)
2 sc again (32)
Sc around x 3
rows
*1 sc, 2sc in
next* (48)
Sc around x 11
rows (48)
Sc 20, 4 x
sc2tog, sc 20
Sc around x 10
rows
*Sc 3, sc2tog*
Stuff firmly so
that ribs are accentuated and back is nice and straight. Don’t attempt to do
what I did and give Akamaru shoulders. It doesn’t work. I repeat, IT DOES NOT
WORK @_@ it ends up giving him a really odd lump in his back that throws
everything else off.
Sc around
*2 sc, sc2tog*
Sc around
*1 sc, 2 tog*
*sc 2tog*
F/O with long
tail
Sew hole closed
To sew close,
just pull the tail through each ch and pull and it slowly starts closing. I
always thought that was the coolest thing ever. X3

ATTACHING THE HEAD: tie on long string to the head and pull it
through chs on head in a circular fashion. This is very important because it
gives more support to the head and doesn’t pull the head in one particular
area. If the pull were localized in one point, the head would be floppy and
weak and the chs would begin to pull and tear. Just be sure not to pull the
string too taught as you weave it through the chs. You don’t want it to pull
the chs close to each other like you do when closing a hole.
Remember to take it slow. One ch at a time….one ch at a time.
And don’t jump around and skip chs.

(the pink dots are where I weaved my yarn through)


(go around once to tack it on then go around one more time to give it a cleaner look and more support)


HIND LEGS:
with white:
Ch 2
8 sc in 2nd
ch
*1 sc, 2sc*
*1 sc, 2sc*
*2sc, 2sc*
Sc around x 6
rows
*2sc, 2tog*
Sc around
*1 sc, 2tog*
Sc around x 13
rows
Sc 3, 2 sc in 3
sc, sc rest
Sc 3, 2 x 2sc
in 2sc, sc rest
Sc 2, *1 sc,
2sc* x 4, sc rest
Sc around x 2
rows
*1sc, 2tog*
sc around
sc around
*sc2tog*
Add the toe
lines: cut three long strands of yarn. Tie one end at the top of the foot (and
pull the end tail from behind so that it is concealed) and pull the rest down
the space between the rows. Tie at bottom. Be sure to keep tail ends long
enough so that when you tuck them in they won’t creep back out. Definitely do
not trim the ends.
Smoosh the paw
every now and again to kinda loosen the stuffing and flatten the bottom so that
Akamaru will have an easier time standing.


To get the hip
shape: Bend the top part of the leg down at an angle then tie it to the rest of
the leg with string. Weave it onto the leg as you have been doing with
everything else. Pull the string taught to get the desired angle you want.


FRONT LEGS: ch
2
Sc 6
in 2nd ch from hook
2 sc
around
*2sc,
2 sc*
Sc around x 10
rows
Sc 3, 2sc in 3
sc,sc rest
Sc 3, 2x 2sc in
2sc, sc rest
Sc 2, 1, 2sc x
4, sc rest
Sc around x 2
rows
*2 sc, 2tog*
*1, 2tog*
Sc around
*2tog*
F/O


(just like the head, go around once to attach and a second time for support and aesthetic appeal)
Attach toe lines. Attach the legs. Attach the front legs first
since they will be the main support for Akamaru (a lot of his weight is
situated in the front of his body). Basically just make sure they are beneath
his body. I situated his hind legs back some so that they resemble a real dog
(I had a german shepherd in mind)

TAIL: with white:
Ch 2
4 sc in 2nd
ch from hook
Sc around x 2
rows
Ch 1, sc around
x 4 rows
Sc around x 2
rows
Ch 1 sc around
Sc around
Ch 1, sc around
Sc around
Ch 1, sc around
Sc around x 10
rows
F/O and attach
on
The tail is
bendable and I usually adjust it into an upward curl. You can probably place a
pipe cleaner in it to help control the shape better so that it doesn’t
constantly unwind.

THE HAIR: With
white: ch 8, (down the side now) sl st, sl st, sc, hdc, hdc, dc, dc, F/O

For mirrored
version, ch 8 then do sequence in backwards order
Place two
pieces back to back, tie not at top, take top end piece and go down right side,
then take left side’s end piece and go up, then hide away the tails. Place on
head and attach using bottom right tail end. Be sure to go slowly with
attaching and weaving the string through the chs.

Pads: (these
aren’t really necessary, I just really like them and they hide the toe lines on
the bottom of the paw and that really bothered me. Just be sure that the pads
aren’t noticeable when Akamaru’s standing and that they don’t disrupt his
ability to stand)
With
light or dull pink:
Ch 2,
Sc 5,
sc tail (this will give you six in all. To sc a tail, drop the main yarn string
and then take the pads tail string and treat it like the new string and sc.)
*1 sc,
2sc*
F/O
Toe
pads: ch 2
Tie
on. Hide ends


CONGRATULATIONS~!!!
You have a new 'Rumi!! :D
Here's what you can do with your new buddy:

Take him outside and pose him with a kunai!! (hopefully of much better quality)


Teach your Akamaru how to sit!!

Put him in your jacket!!

Put him on your head!!

Put him in your hood!!

Pose professionally together!!
(with a flip flop too cuz you're chill like that)

Share a tender moment!!
And most important of all...

ENJOY YOUR NEW BUDDY IN ALL HIS CUTENESS~!!
Any questions, comments, or concerns? Catch me on tumblr as princessdwirk.tumblr.com
or on my deviantArt as Vapor-neko.deviantart.com
Happy with how your Akamaru turned out?? Send me pics, I would love to see them!! ^.^
This is a FREE pattern.
Please do not redistribute this pattern as your own and most definitely do not sell this pattern or Akamarus!!
Akamaru is copyright of Masashi Kishimoto
HAPPY CROCHETING!!!!