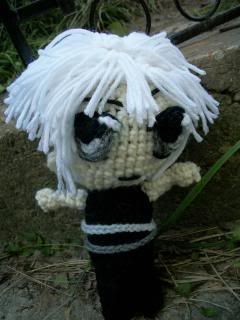
Yup! Straight from Fruits Basket's cursed Sohma house, it's....
.:~*HATSUHARU SOHMA*~:.
SPECIAL THANKS GOES TO SAIJAY AND ROB @ http://kandjdolls.blogspot.com/
The body pattern for this amigurumi comes from one of their patterns (the adorable Pink Little Lady)
and they have kindly posted the original body pattern on their blog to use with these doll designs. =) Thank you again!!
Order of Importance:
*Check Color Chart
*Legs and Rnds 1-19
*Add eyes, eyebrows, and mouth
*Finish head
*Add ears
*Add Hair
*Crochet Arms
*Add Accessories
Body Pattern:
Color Chart:
Legs and Rnds 1-10: Black
Rnds 11-23 and Arms: Skin color
Hair: Black and White
*Skip working the backloops on rnd 5*
~Creating Hatsuharu~
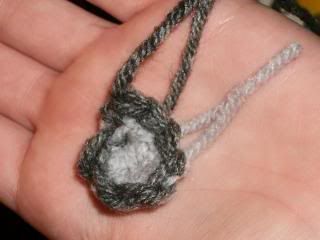
-Eyes:
Stop at Rnd 19 and start crocheting the eyes.
Helpful Hint: Mark spots for eyes and mouth with washable marker
-Colors: Gray, silver, black, and white
Iris: Ch 6 then sc tail
(to do this: pull tail through center ring and sc it like you would on a regular working chain)
Change to gray and sc around
F/O w/long tail for sewing
Pupil: ch 2,
5 sc in ring, sc tail
Highlight:
w/white Ch 7
Sew on the eyes where you marked. Make sure the whole pupil is sewn down.
Take the highlights and pull one tail through a loop in the black pupil and the other tail just outside the iris.
This gives him the "anime-eye" effect. =)
Eyelids:
This is very simple. Just cut four strands of yarn and sew them across the top and bottom of the eye. Voila!
-Eyebrows:
Angle them slightly since Haru usually has a bored or pensive expression but keep them relatively straight.
-Mouth:
Just a single string but very hard to get the right angle. Most of them look like they're smiling when I do it.
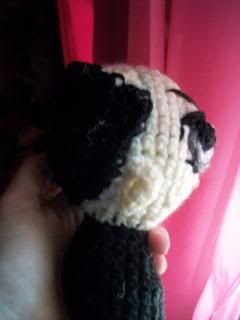
-Ears:
w/skin color ch 6
hdc 3, sc 2, then sl st in last st
F/O
-FOR OPPOSITE EAR:
w/skin color
ch 6
sl st, sc 2, hdc 3
F/O
I usually put them about 3 rows from the eye.
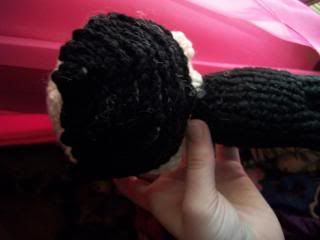
-Hair:
White top w/ shaved black
- Make the hairlines with a washable marker.
Sc on top of the line and then go down the next part until the area within is filled.
-For the white part: Simply add and cut. This is really fun.
The back part of the white hair needs to be almost a bowl cut.
For his bangs, have the ones on his forehead short and the ones next to them a little longer.
He has two long strands going down the side of his face below his ears.
-Arms: skin color only
-Earrings:
Take silver string and tie through earlobes. Hide tails from view but don't cut them. They'll stick out.
-Belts: w/silver and dark grey
ch 29 and tie.
~Your Hatsuharu is complete~ =)
Hope you enjoy your new 'Rumi! =)
Please do not re-post this pattern or Sayjai's pattern anywhere without permission. This pattern is for free use only and is not to be sold anywhere.
No comments:
Post a Comment