Hi everybody~!! =3 Time to introduce one of my favorite 'Rumi Roomies!! He is the laziest character from Naruto, a.k.a....
*drum roll*
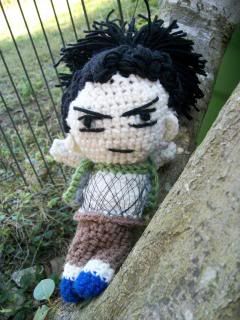
.:*~Shikamaru Nara~*:.
SPECIAL THANKS GOES TO SAIJAY AND ROB @ http://kandjdolls.blogspot.com/
The body pattern for this amigurumi comes from one of their patterns (the adorable Pink Little Lady)
and they have kindly posted the original body pattern on their blog to use with these doll designs. =) Thank you again!!
Order of Importance:
*Check Color Chart
*Crochet Legs and Rnds 1-19
*Create eyes, eyebrows, and mouth
*Finish head
*Add ears
*Create Mesh Shirt (front part)
*Make Jacket and add on
*Finish Mesh Shirt (back)
*Crochet arms and sleeves
*Add hair
Body Pattern:
Color Chart for Body:
-Legs:
Rnds 1-3: Blue (Shoes)
Rnds 4-5: Skin (since his pants don't hit his ankles)
Rnds 6-8: Brown (pants)
-Body:
Rnds 1-3: Brown
Rnds 3-23: Skin color
*Skip working the back-loops, unless you just want him to have a belt*
Creating Shikamaru:
-Eyes:
I usually stop to do the eyes on Rnd 19. I put a small piece of yarn in the working loop and close it so I don't accidentally undo the whole head (learned that the hard way).
Get a washable marker (recommended) and mark where you want the eyes placed so that they're in proportion Place a mark for the mouth as well, but don't add a nose.
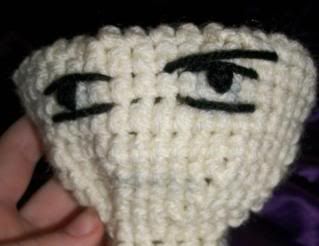
For the lazy eyes: Take a piece of long black yarn for the top of the eyelid on both sides.
-Pupil (2):
w/black ch 3
Pull one tail through the space below the eyelid and pull the other tail through a space one ch below. This males his pupil. =) Refer to picture is you're not quite sure.
Now add the bottom eyelid. Make sure it doesn't touch the pupil.
Now that one eye is done, time to take care of any noticable marks from that marker. Take a slightly damp tissue and wipe it off. Don't let the yarn get really damp of course..
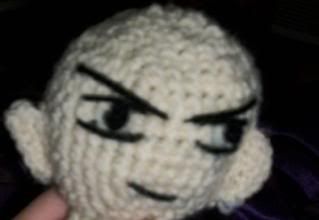
-Eyebrows:
For the "Angry Brows" Take a long piece of black yarn and place it so that one end is touching the eyelid point and the other is amost at the top of the last row you recently completed.
Add slanted mouth and finish the head crocheting the head.
-Ears:
W/skin color ch 6
hdc 3, sc 2, then sl st.
F/O and attach to the head on the row below the eyelid line.
I put them about 3 ch rows from each eye. Attach the ears on both sides.
I put them about 3 ch rows from each eye. Attach the ears on both sides.
-For Earrings:
You won't be able to see them much, but hey they still count!
Take silver string and tie through his earlobles. Hide the tails in the nearest opening.
Take silver string and tie through his earlobles. Hide the tails in the nearest opening.
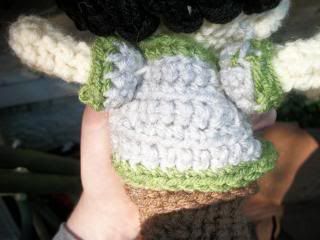
-Mesh Shirt:
-W/ Green: Sc across Shika's chest just bleow the neckline (this is the top of his shirt). Don't have it right on the neck.
-With thin black string (or thin yarn) start diagonally sewing them across torso and navel area. Don't worry about going all the way around to the back because his jacket will cover most of it You can come back and add the string wherever needed later.
-Once you're finished, sew the sring opposite of the previous ones to make the criss-cross pattern of the mesh..
-Jacket:
W/grey: Ch 16
sc across the top 7 times.
-Sleeves (2):
w/grey: ch 11
sc across top
w/green: sc around
F/O
*Hair*
Take your washable marker and outline his hairline. It makes life so much easier. =)
Now take your black yarn and attach it according to your hairline. Make it long enough so that you can tie it back into his signature ponytail!!
Note: Don't go overboard with your hair. Too much of it will cause the head to droop and need support like my poor 'Rumi. =(
Your Shikamaru is now complete~!! =)
I hope you enjoy him and thanks for visiting~! =) Please do not repost this pattern or Sayjai's pattern without permission. This pattern is for free use and not to be sold anywhere.
No comments:
Post a Comment